How to Refinish a Dashboard in a Classic Car or Truck
If you’re looking to refinish a dashboard in a classic car or truck, you’re not alone. GM Square Body trucks are in high demand, and for many enthusiasts, the Square Body Chevy Blazer is the ultimate find. As these vehicles approach 50 years old, some level of restoration is almost always needed. Exterior panels may show rust or dents, and interiors often fade, crack, or discolor over time.
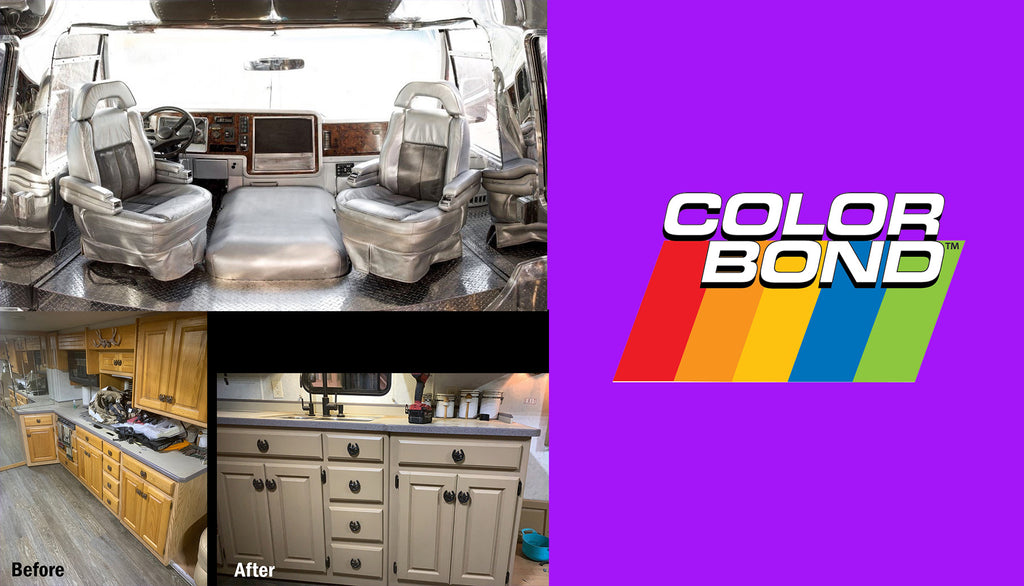
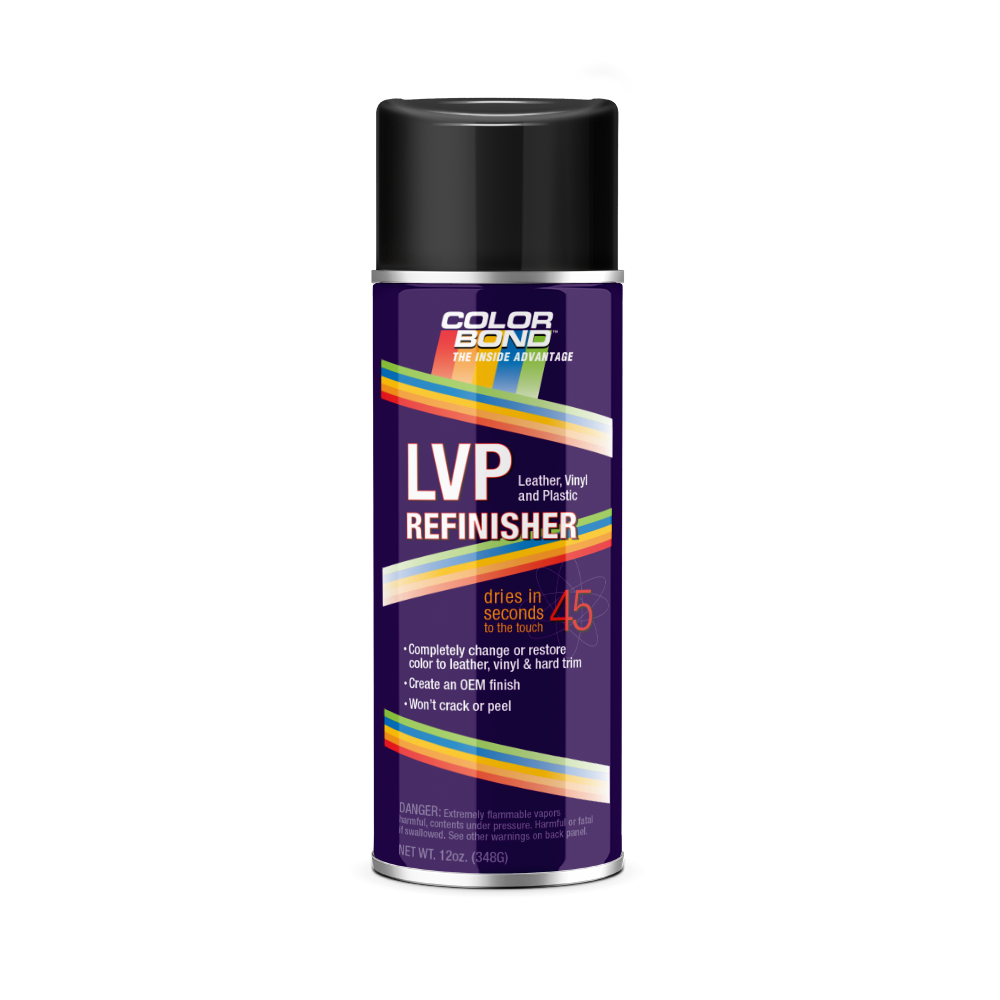
Our customer, Louie Atienza, found himself in that exact position. His ’74 Blazer interior needed attention, especially the plastic components. Like many owners trying to refinish a dashboard in a classic car or truck, Louie turned to ColorBond LVP OE to bring his interior back to life. If you’re wondering how to refinish a dashboard, console, door panels, or other interior surfaces, here’s how he did it.
Louie’s Dream Blazer
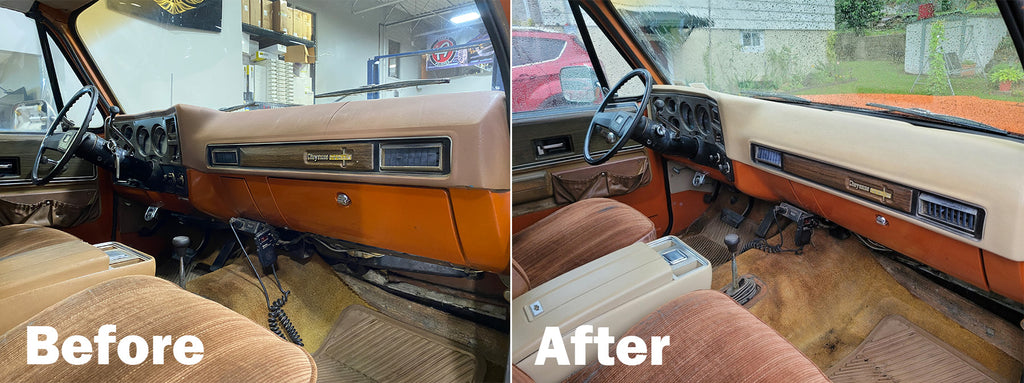
Louie recently purchased his dream vehicle, a 1974 Chevy Blazer in Cheyenne trim. While the truck had low mileage and was in great overall condition, the interior showed its age. The dashboard and console were cracked and had darkened from years of exposure to the desert southwest climate.
Rather than going for a full concours restoration, Louie simply wanted to improve the look of his daily driver. Like many enthusiasts looking to refinish a dashboard in a classic car or truck, his goal was practical, clean, and cost-effective results.
Start with the Best Dashboard Color Coating
While researching how to refinish a dashboard in a classic car or truck, Louie came across online discussions about using a color coating instead of replacement parts. That led him to ColorBond LVP OE.
He chose it because it is easy to apply and forms a molecular bond with leather, vinyl, and plastic surfaces. Unlike traditional products, this color coating won’t crack, flake, or peel. Its thin film allows original textures, like factory grain patterns, to remain visible, which is key when you refinish a dashboard in a classic car or truck and want it to look authentic.
ColorBond LVP OE is available in more than 150 colors, many of which are OEM-correct, making it a strong choice for restoration work.
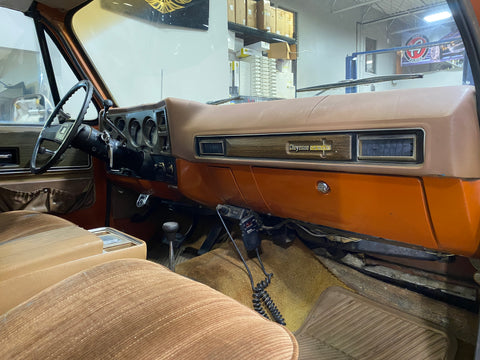
Dashboard before
How to Refinish a Dashboard
If you’re getting ready to refinish a dashboard in a classic car or truck, starting with the right process makes all the difference. Whether your dashboard is cracked, faded, or discolored, the goal is to create a clean, smooth surface and apply a durable color coating that looks factory-correct.
Step 1: Repair and Prepare the Surface
Before you refinish a dashboard in a classic car or truck, inspect it for cracks, warping, or damage. If needed, install a dash pad overlay or make repairs to create a smooth, even surface. A solid foundation ensures the color coating applies evenly and holds up over time.
Step 2: Deep Clean the Dashboard
Thorough cleaning is essential. Dirt, oils, and other contaminants can interfere with adhesion. Start by scrubbing the surface with soapy water and a soft brush to remove buildup from years of use.
Step 3: Remove Residue with Prep Cleaner
After the initial cleaning, use ColorBond Prep Cleaner to remove any remaining residue. This step ensures the surface is completely clean and ready for coating. When you refinish a dashboard in a classic car or truck, even small amounts of leftover residue can impact the final finish.
Step 4: Apply Light Coats of Color Coating
To coat the dashboard, apply a light mist coat from about 12 inches away. Allow it to dry for about two minutes, then follow with additional light coats, gradually building coverage.
When you refinish a dashboard in a classic car or truck, applying multiple thin layers is key. This helps the color coating bond properly, prevents uneven buildup, and allows the original texture and grain to show through.
Step 5: Add UV Protection
Finish with ColorBond Dash Clear UV Protectant for added durability. Apply it evenly with a soft cloth, then wipe away any excess. This step helps protect the surface from sun exposure and keeps the finish looking consistent over time.
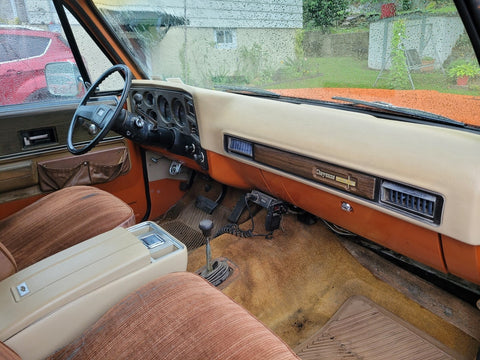
Dashboard after
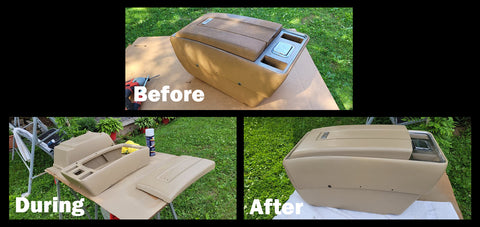
Refinishing Interior Components Like Consoles
The same general process used to refinish a dashboard in a classic car or truck applies to other interior components like consoles, trim pieces, and panels, with one important adjustment for hard plastics.
Step 1: Use an Adhesion Promoter for Hard Plastic Surfaces
For hard plastic components, apply ColorBond Adhesion Promoter before the color coating. This improves bonding and ensures long-term performance.
Step 2: Follow the Same Cleaning and Coating Process
Once prepped, follow the same steps used on the dashboard, clean thoroughly, apply light coats, and build coverage gradually. Taking a consistent approach helps create a uniform, factory-like finish across the entire interior.
A Job Well Done
Louie was thrilled with how everything turned out, and it’s easy to see why. By choosing to refinish a dashboard in a classic car or truck instead of replacing parts, he saved a significant amount of money. The entire project cost him around $90, while replacement components would have cost several hundred.
More importantly, he was able to restore the look of his Blazer’s interior without sacrificing originality or texture. For anyone looking to refinish a dashboard in a classic car or truck, this project shows what’s possible with the right approach and the right color coating.
Get Started Today with ColorBond!
For more information on how to refinish a dashboard in a classic car or truck using ColorBond LVP OE, reach out to us at [email protected] or call (877) 882-6567.