Refinishing a Motorcycle Seat with ColorBond is Simple and Yields Excellent Results
ColorBond customer Paul Allbritton was kind enough to share his Harley Davidson motorcycle seat refinishing project with us. He purchased this Danny Gray Airhawk seat used on e-bay from the original owner who had wrecked his bike. Originally made with black leather and a blue alligator skin inlay, it truly is a functional work of art.
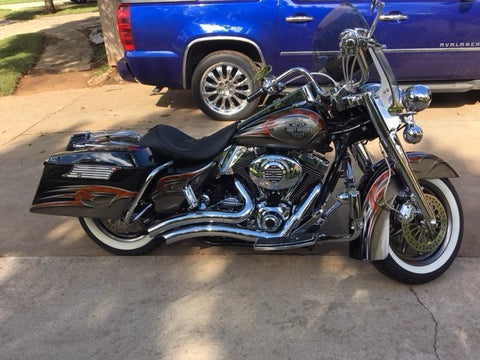
Paul had recently restyled his 2006 Harley Davidson Road King Classic, which included replacing the leather saddle bags with fiberglass units and painting the bike and wheels in a custom gray color. He also ran wires inside the handle bars, changed the exhaust to a Vance and Hines Big Radius 2 Into 2 Exhaust, and built the engine up with different cams and pistons. Paul wanted the color of his Danny Gray seat to complement the new gray paint, and decided the blue inlay wasn’t going to work. He felt a re-dye of the seat was necessary.
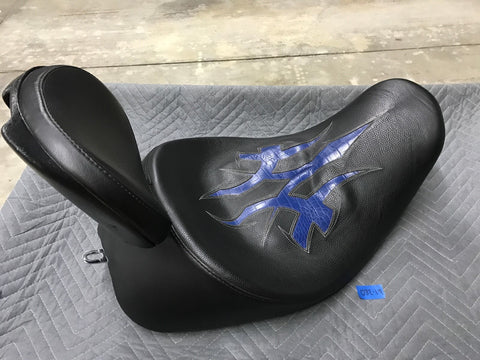
Danny Gray seat – before
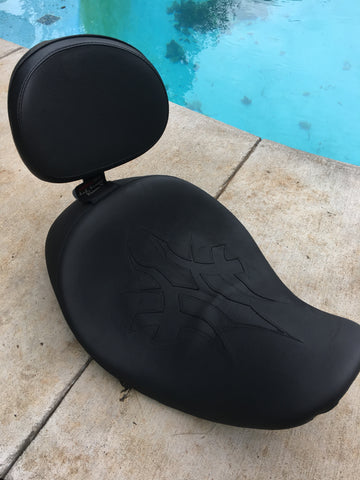
After refinishing with ColorBond LVP Refinisher

“I was a bit skeptical re-dying this seat, as I had previously used motorcycle seat dye, and it was a bad experience – it came off on my jeans” Says Paul. “I went online and Googled “Motorcycle Seat Dye” and happened to see ColorBond. I was familiar with them, having seen their Pro Tech Black Tail Lite Color in the past. So, I checked out the website and saw examples of using their interior paint and it looked great. I said to myself “If someone can change the color of the whole inside of a car, I can surely change the color of a motorcycle seat. The product was inexpensive, so I ordered a can and gave it a try.”
Motorcycle Seat Restoration
For preparation before painting Paul first scrubbed the seat with a solution made up of a small amount of Dawn detergent mixed with water. This was followed by ColorBond Prep Cleaner. Next, he roughed up the alligator skin inlay with 1200 grit sandpaper, and then lightly sanded the rest of the seat. As a final step, he wiped the seat down with a tack cloth before Painting with ColorBond LVP Refinisher.
“I used only one coat! (of ColorBond LVP Refinisher). It dried fast and came out great!” Said Paul. “After it dried I wiped the seat down with a white cloth to see if there would be any residue. There was none. I used another brand of dye in the past and found it was too thick, which reduced the surface texture. With Colorbond, the grain patterns of the leather and alligator skin were well defined. My next project is masking off the inlay and painting it with ColorBond to match the paint on the motorcycle.” Paul concludes.
Editor’s note: When applying a coat of ColorBond LVP Refinisher on top of an existing coat of ColorBond LVP refinisher of a differing color, first let the existing coat dry for 24 hours. ColorBond won’t build up – so the visibility of the texture of the part surface will never be compromised. Even with multiple coats. Preparation is simple – just wipe down the existing coat with ColorBond Prep Cleaner.
We at ColorBond thank Paul for taking time to send us photos and tell us about his project. We’ll share the result of his next project when it becomes available.
Please visit the ColorBond Paint Selector page to choose your next look!