How to Paint a Leather Chair and Get Excellent Results
You might have an aging leather chair that is faded or discolored, but in otherwise good condition. The chair has become an eyesore, and something needs to be done. To replace it would be expensive, and having it professionally refinished or reupholstered would be costly too. However, you might be thinking of doing the job yourself as an economical option.
If you are wondering how to refinish a leather chair and what the process looks like, you are in the right place. Below is your step-by-step guide to refinish a leather chair using ColorBond.
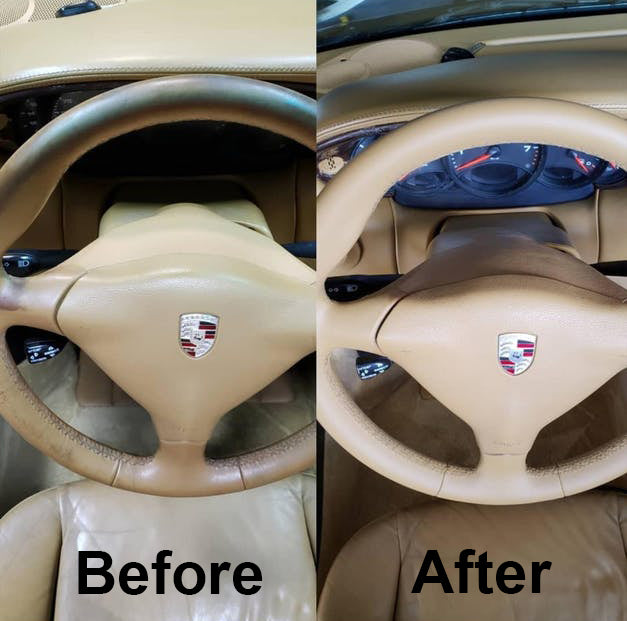
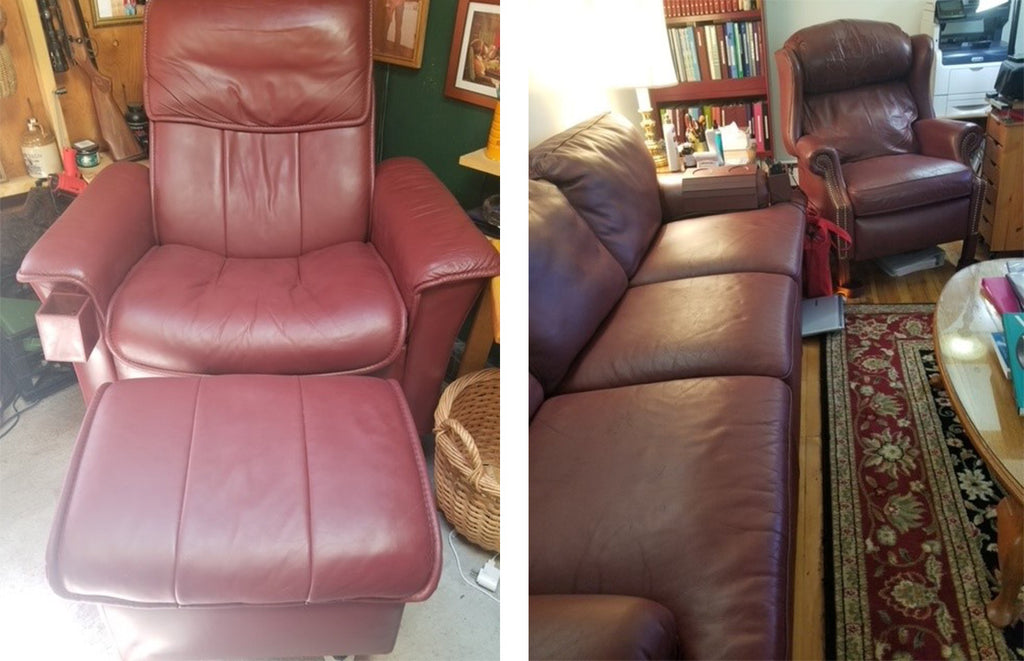
Painted with ColorBond LVP OE
How to Refinish a Leather Chair with ColorBond
You might have an aging leather chair that is faded or discolored but in otherwise good condition. The chair has become an eyesore, and something needs to be done. To replace it would be expensive, and having it professionally refinished or reupholstered would be costly too.
If you are wondering how to refinish a leather chair and what the process looks like, you are in the right place. Below is your step-by-step guide to refinish a leather chair using ColorBond.
1. Prepare Your Workspace and Chair
Start by setting up a clean, well-ventilated area where you can work comfortably. Lay down drop cloths or plastic to protect floors and nearby surfaces from overspray. Place the chair in the center of the space so you can move around it easily.
Remove any detachable cushions and hardware if possible. Take a few minutes to inspect the leather closely. Look for worn spots, cracks, or heavy staining so you know where you may need to spend extra time as you refinish a leather chair.
2. Make Repairs to the Leather
Before applying any product, take care of any damage. If your chair has holes, tears, or burns, you should repair them first. This is something you can typically handle yourself with a leather repair kit.
Most kits include patches, adhesives, and sometimes heat tools to help restore the surface. Since this guide focuses on how to refinish a leather chair, we will not go too deep into the repair process. A quick search for leather repair kits will give you plenty of options and reviews to help you choose the right one for your needs.
3. Thoroughly Clean the Leather Surface
Once repairs are complete, you need a completely clean surface before you refinish a leather chair. Use a high-quality leather cleaner to remove dirt, oils, and buildup that can prevent proper adhesion.
Focus on high-contact areas like armrests and seat cushions. Apply the cleaner with a soft cloth, working it into the leather gently. Wipe away residue with a clean, damp cloth and allow the chair to dry fully. If the leather still feels slick or uneven, repeat the cleaning process until it feels consistently clean.
ColorBond Prep Cleaner is specifically designed for this task. Prep Cleaner is a liquid non-solvent, aqueous-based cleaner that is applied with a cloth. It thoroughly removes contaminants and doesn’t leave a residue that can interfere with coating adhesion.
4. Lightly Prep and Mask Off Surrounding Areas
Once the chair is clean and dry, lightly prep the surface if needed. If the leather has a glossy finish, use a fine abrasive pad to gently scuff it. This helps the coating bond more effectively, but keep it light, you are not sanding the leather down.
After prepping, wipe away any dust with a lint-free cloth. Then use painter’s tape and paper to mask off any areas you do not want to coat, such as wood trim, metal components, or fabric sections. Taking the time to mask properly will give you a much cleaner final result as you refinish a leather chair.
5. Test and Apply the First Light Coat
Shake the ColorBond can thoroughly according to the directions. Before committing, test the color on a hidden area to make sure it matches your expectations.
When ready, hold the can at a consistent distance and apply a very light first coat. Use smooth, even passes and keep the can moving at all times. Do not try to achieve full coverage right away. The goal of the first coat is to create a base layer that promotes even buildup as you refinish a leather chair.
6. Build Color with Multiple Thin Coats
Allow the first coat to dry slightly, just enough so it’s no longer wet to the touch, then begin applying additional light coats. Work in sections, seat, backrest, arms, to stay organized and maintain even coverage.
Use overlapping passes and avoid spraying too heavily in one spot. If an area starts to look wet or uneven, pause and let it dry before continuing. Building color gradually with multiple thin coats will help prevent runs and give you a smoother, more professional finish when you refinish a leather chair.
7. Let the Chair Cure and Inspect the Finish
After achieving full coverage, allow the chair to dry and cure based on the product instructions. Even if it feels dry to the touch, give it adequate time before using it.
Once cured, inspect the chair in good lighting. If you notice any thin or uneven areas, apply a final light touch-up coat. When done correctly, you can refinish a leather chair so it looks refreshed, evenly colored, and ready for everyday use.
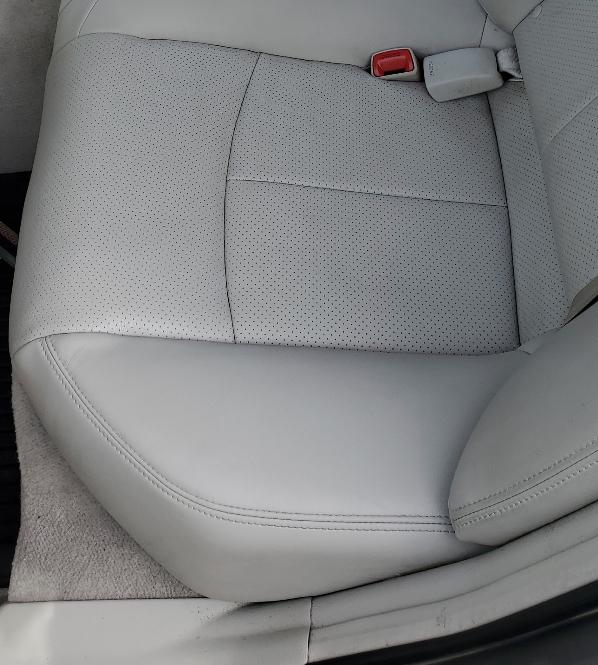
Restored with ColorBond LVP OE
What’s the Best Product to Refinish a Leather Chair?
A big part of how to refinish a leather chair and get great results is choosing the right product. Many people ask if standard spray paint can be used, but traditional spray paint is not designed for leather. It does not bond properly and can crack or peel as the material flexes.
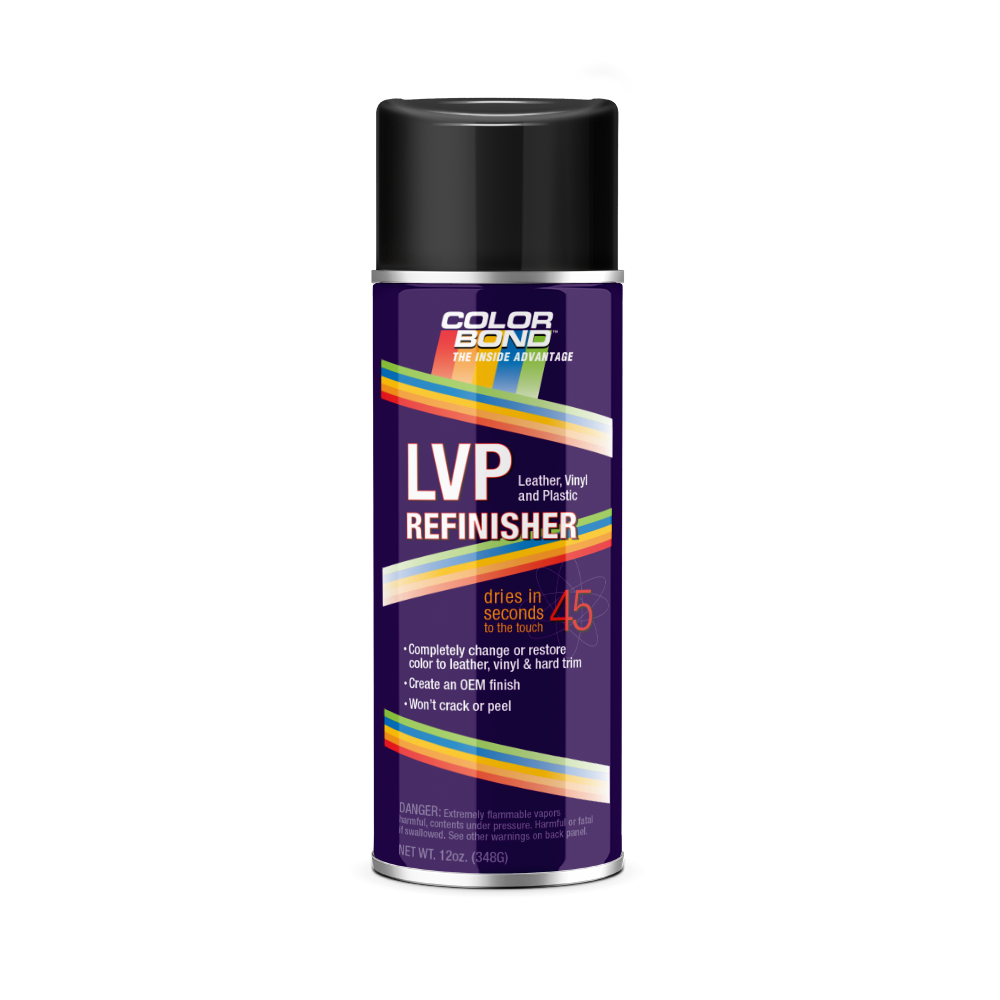
ColorBond LVP OE is specifically designed for leather, vinyl, and hard plastic. It forms a molecular bond with the surface while remaining flexible, so it will not flake, crack, or peel. It also preserves the natural grain and appearance, which is essential when you refinish a leather chair and want it to look original rather than coated.
The application is straightforward. Apply a light mist coat about 12 inches from the surface, allow it to dry for a couple of minutes, and continue building coverage with additional thin coats. A thin application provides excellent coverage, so there is no need for heavy buildup when you refinish a leather chair.
Can You Refinish a Leather Chair Economically?
As many customers have found, choosing to refinish a leather chair instead of replacing it can save a significant amount of money. Replacing multiple pieces of leather furniture can cost thousands, while refinishing them yourself is far more cost-effective.
With proper preparation and application, you can refinish a leather chair and achieve results that look clean, consistent, and long-lasting. If you have questions about how to refinish a leather chair or which ColorBond products to use, feel free to reach out for guidance.
Real Life Success Story with ColorBond
Harry Shaw did a wonderful job using ColorBond LVP OE for a leather furniture restoration project. Harry already knew how to refinish a leather chair as he had previously used ColorBond for other projects. Among the pieces refinished was a 100-year-old horse-hair stuffed leather chair used by his grandfather when he was a judge in Aspen, CO. Harry remembers sitting in that chair as a youth, while his grandfather gave him lectures on life. We at ColorBond are honored that he trusted our products for use on something that has so much sentimental value.

Harry’s Grandfather’s Chair – Refinished with ColorBond LVP OE
Harry tells us that replacing the two leather chairs and the leather couch with duplicates would have cost about $10,000. Yet, ColorBond only cost about $600-$700 for the furniture restoration project.

“It’s the best leather coating I’ve ever used” says Harry. For preparation, he simply cleaned the leather with alcohol mixed with water and then painted it with ColorBond LVP OE. “The results look great! I love it,” Harry exclaims.
Get Started with ColorBond Today!
If you are ready to refinish your leather chair and skip the cost of replacement, ColorBond makes it simple to get professional-looking results at home. Get started with ColorBond today!