Mustang GT Interior Restyle with ColorBond!
Recently a ColorBond customer, who goes by the handle “Voo Doo Daddy” began an interior restyling project on his 2016 Mustang GT starting with the seats. He tells us about his experience:
“Back in 2012, not long after the Gen 1 Coyote Mustangs began prowling the streets, I saw a pearl White Mustang GT with what I would call kind of an “Ox Blood Red” leather interior. I thought it looked fantastic and I have wanted that color leather interior since then.
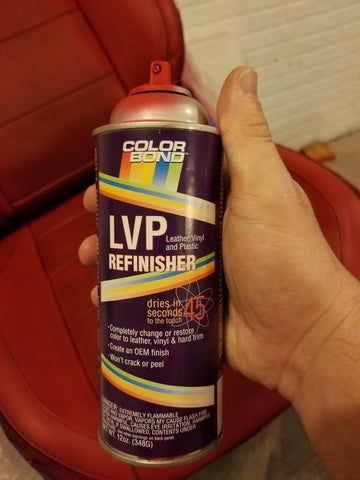
I was thinking of going with having my seats re-covered in Katzkins red leather, but that was going to cost me somewhere around $1,500 with materials and labor to have a local shop do it. so I decided to paint my leather seats from black to red using ColorBond LVP Refinisher car interior paint.
First off, I am very pleased with this color choice, but it is not as bright red as the factory ‘red showstopper’ leather interior, but it is more like the Ox blood red I mentioned above. ColorBond has many different reds/colors to choose from.
First, I removed the seats from the car and cleaned them before applying the car interior paint. Use a clean microfiber towel, first spray the seats liberally with glass cleaner containing ammonia. The ammonia does a great job of removing grease/oils. Do this twice and then let the seats dry thoroughly. Use your heat gun/hair dryer to speed this up if you want.
This part may seem a bit barbaric, but it had to be done. The only part of the front & rear seats of the factory “leather” interiors of the Mustang is the center sections of the FRONT seats. Everything else is vinyl. Now that the seats had been cleaned/degreased, I needed to scuff the leather center sections of the front seats with the Scotch-brite pad to prepare the leather to accept the new color. I didn’t worry about this; leather is a very, very tough material that is why it has been in use for thousands of years. I only scuffed the center sections of the seats. I did NOT scuff the vinyl sections of the seats!
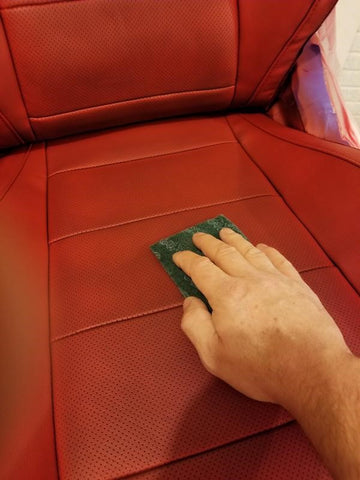
I didn’t need to go crazy with this step, just a good scuffing. You’ll notice in the picture, I have already started to re-dye the seat, that is because I forgot to take a pic before I started. After scuffing the seats, I wiped them down again with rubbing alcohol and began masking.
I could not get regular masking tape to stick to the vinyl surfaces that make up the vast majority of the Mustang’s seats. Matter-of-fact, the only tape I could find that would stick to the seats to begin the masking is duct tape, more specifically Gorilla Tape. It does not want to bend around corners, so I had to tear it into many, many, many smaller strips to go around all the corners of the seat seams and headrests. This is a bit tedious and time consuming, but there was no other way.
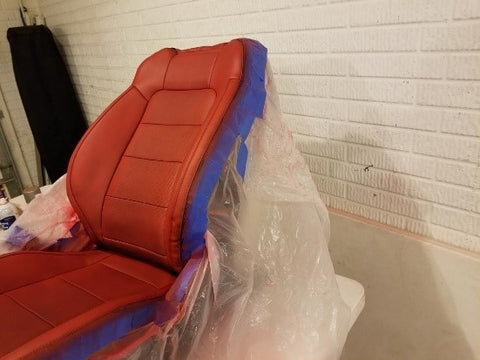
Once the seat was masked off to my liking, I applied plastic sheeting to the sides/top/bottom of the seats using regular masking tape.
Then I started spraying the LVP Refinisher.
I found painting the black seats to red can take anywhere from 15-20 light coats to achieve the desired results. It is very important to use many, light coats and not over-apply the paint!!!
I held the spray can 7-9 inches from the surface of the seat, and sprayed a light, misting coat onto the leather. I started with all of the seams first, then moved inward to do the entire surface. I let the light coat dry for at least one minute, then did another light coat going in the opposite direction to the first coat. Basically up/down, and then right/left.
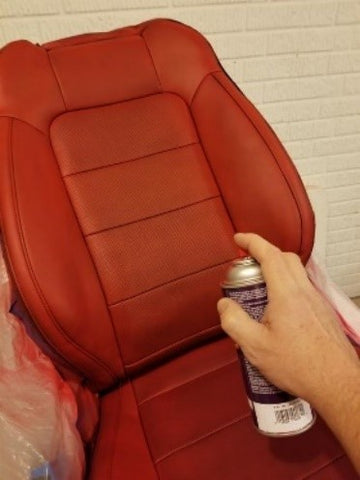
As I applied the first 3-4 coats, I was not happy with the results. But I gave it time and kept repeating the process. It took time and repeated coats to cover the much darker black color.
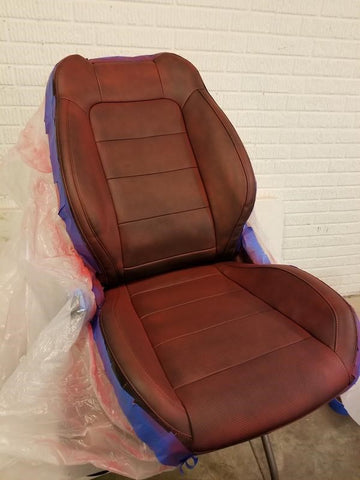
This picture shows my progress after 3-4 light misting coats of dye. Not pretty.
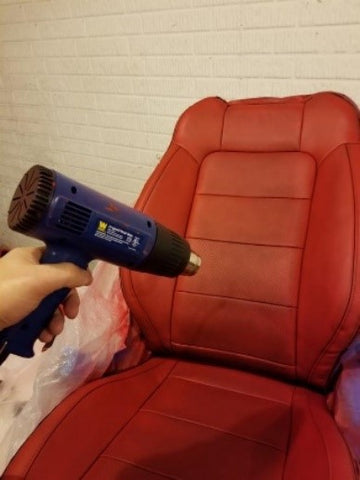
For proper coverage I applied 10-12 light coats of paint and used a heat gun between coats.
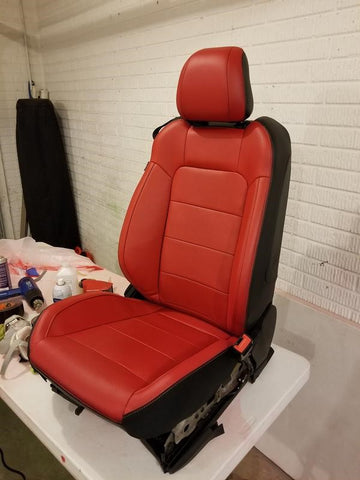
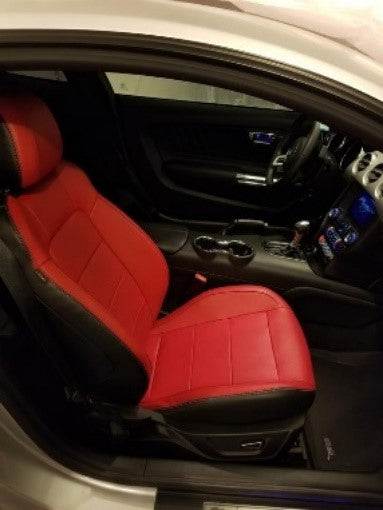
The final result!
I love the look and I love the fact that it took $100-$120 in materials, and only a few hours of my time.”
Congratulations Voo Doo Daddy on such a great job!
For more information on ColorBond LVP Refinisher Click Here